
If you want to know how to adjust air shocks on Harley Davidson, this guide introduces you to the proper techniques or methods that you can adopt to get the job done.
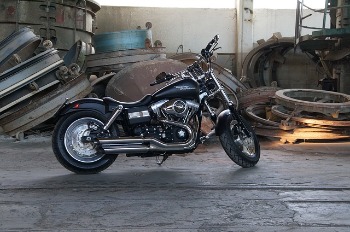
Air shocks are important parts of Harley Davidson’s suspension system.
They accommodate or take in any form of pressure while riding so that your bike can run smoothly and be in contact with the ground.
Before now, air shocks were only popular in heavy trucks. However, today, air shocks are being implemented in bikes.
Thanks to the continuous innovation and transformation in design and technology.
As you read along, you will know how the air shocks work on Harley, why you may need to adjust the air shocks, and the various methods you can adopt to adjust the air shocks.
In the end, you will have sufficient knowledge of this process, and you will be able to adjust your Harley Davidson’s air shocks on your own.
Contents
- 1 How does air shocks work on Harley?
- 2 How much air can you put on Harley shocks?
- 3 Why do Harley air shocks need adjustment?
- 4 How to Adjust Air Shocks on Harley Davidson
- 5 Time
- 6 Tools
- 7 Cost
- 8 Adjusting the air shocks on Harley Davidson (Process step by step)
- 9 04. Adjust the air pressure
- 10 05. Disconnect the hose
- 11 Pros of adjusting air shocks of Harley
- 12 Cons of not following the adjustment chart
- 13 Adjustable Air Ride from XFMT
- 14 FAQ’s How To Adjust Air Shocks On Harley Davidson
- 15 What makes the Harley Davidson air pump different from other air shocks pumps?
- 16 How long do air shocks last?
- 17 What happens if I use an air compressor to adjust the shocks?
- 18 How do I decide the ideal psi in my air shocks?
- 19 What happens if the air suspension fails?
- 20 How much does Harley Davidson’s air shocks cost?
- 21 What happens if I drive a bike with a failed suspension?
- 22 Verdict
How does air shocks work on Harley?
The air shocks rely on inflatable air springs and air to raise or lower your motorcycle to the desired height.
You can either choose to add more air pressure or release excess air pressure in your suspension.
When you increase your motorcycle’s height, especially when you add extra load (luggage or passenger).
The ride experience is greatly improved. It becomes smoother and more enjoyable.
For an individual who desires to lower the height of their bike, this adjustment guarantees improved control, stability, and handling.
How much air can you put on Harley shocks?
According to Harley Davidson, the maximum air pressure you can put in the suspension air system shocks for the FLHRX models is 50 psi.
If you own other models aside from the FLHRX, the maximum air pressure the suspension shocks can accommodate is 35 psi.
Under no circumstance may you exceed these limits.
Why do Harley air shocks need adjustment?
- When the air shocks leak or fail to hold pressure for a longer or extended period
- When you are adding an additional load (passenger or luggage)
- If you are carrying less weight, especially after an initial increase in the air pressure. You may need to adjust the air pressure to the current load.
Basically, air shocks are adjusted to easily accommodate the load you are about to put on your motorcycle.
Recommended preload settings chart
| All models except FLHRS (Harley-Davidson Road King motorcycle model)- Standard Shocks | ||
| Shock Load | Total Weight | Pressure |
| Solo Rider | Around 150 pounds. (68 kilogram) | 0 psi |
| Solo Rider | 150-200 pounds (68-91 kilogram) | 0-10 psi (0-69 kPa) |
| Solo Rider | 200-250 pounds (91-113 kilogram) | 5-10 psi (35-103 kPa) |
| Rider with passenger | Around 150 pounds (0-68 kilogram) | 10-15 psi (69-103 kPa) |
| Rider with passenger | More than 200 pounds (over 91 kilogram) | 20-25 psi (138-172 kPa) |
| Maximum GVWR | 20-35 psi (138-241 kPa) | |
| FLHRS (Harley-Davidson Road King motorcycle model) only- Low profile shocks | ||
| Solo Rider | Around 160 pounds. (0-73 kilogram) | 0-5 psi (0-35 kPa) |
| Solo Rider | 160-200 pounds (73-91 kilogram) | 0-10 psi (0-69 kPa) |
| Solo Rider | More than 200 pounds (91 kilogram) | 5-10 psi (35-69 kPa) |
| Rider with passenger | Around 150 pounds (0-68 kilogram) | 20-30 psi (138-207 kPa) |
| Rider with passenger | More than 150 pounds (over 68 kilogram) | 25-35 psi (172-241 kPa) |
| Maximum GVWR | 40-50 psi (276-345 kPa) | |
How to Adjust Air Shocks on Harley Davidson
Time
Air shocks adjustment is one of the easiest modifications you can make on your bike.
First, you need to get yourself familiar with all various parts of the air pump and your bike’s suspension system.
On average, it takes between 10 and 20 minutes to complete this exercise.
Tools
- A small portable air pump, preferably the Harley Davidson compact air pump 5463003A.
- A clean rag
- Owner’s manual
Cost
The Harley Davidson compact air pump costs about $50. However, there are other pocket-friendly designs on the market that works just the same way.
On average, you can get any of these designs between $10 and $25.
Adjusting the air shocks on Harley Davidson (Process step by step)
There is a recommended preload setting for your particular weight range. However, you can deviate from that depending on how you like to ride and how stiff you want your rear suspension shocks.
While at it, ensure you do not exceed the maximum psi.
01. Put your tool in place
Get yourself the recommended pressure pump (check our list of tools section).
This is the major tool that you need to adjust your motorcycle’s shocks or suspension. Ensure you keep this tool within reach.
02. Locate the air valve
The air valve is located on the left side of the bike, right inside the rear saddlebag. You will need to take off the saddlebag before the valve can become seen or accessible.
Open the saddlebag’s lid. There are clips inside the lid, one clip on each side. Turn these clips counterclockwise till they release.
Once you take off the saddlebag, the air valve becomes visible and easily accessible.
03. Attach the air pump
Your air valve either has a cap or not. If it has a cap, remove it.
Pick your air pump and connect the hose to the air valve. This flexible hose guarantees easy connection.
Connect the hose to the air valve until it is firm or well-tightened. Once connected, the current air or psi in the suspension is displayed on the air gauge.
04. Adjust the air pressure
Now that the air pump has been connected, you can pump in the amount of air pressure you desire.
We advise you use the air shock hand pump only to avoid causing any damage to the suspension system.
The necessary air pressure adjustment must be made in agreement/alignment with the rider’s weight.
For instance, if the air pressure displayed on the gauge is 10 psi, and the recommended air pressure for the rider’s weight is 15 psi.
You will have to add 5 psi to achieve the ideal psi for your weight.
Suppose you pumped in more air than the recommended or desired amount. In that case, you can use the release valve on the pump to adjust the air pressure in the system or let the excess air out.
Check the air shocks adjustment chart for the standard psi calculation according to load weight. This ensures you achieve the best performance from your air shocks.
05. Disconnect the hose
Once you have successfully set the desired or recommended pressure for the rear suspension. You can then go ahead and release the flexible hose and reinstall your air valve cap and the left saddlebag.
Pros of adjusting air shocks of Harley
- If you decide to ride with someone else or add additional weight to your bike, adjusting the air shocks prevent the rear end from sagging.
- This lifts the back end high enough to accommodate the extra load or weight
- Are you riding your bike without an additional load? A readjustment made to the air shocks after an initial increase in psi will bring the bike back down to a suitable height to ensure outstanding ride quality
- Your motorcycle can be customized to deliver your desired expectation or preference.
- For instance, if you desire a soft, firm ride, or you want to experience a little bit of both, you can easily adjust the air shocks to achieve the ride quality you desire.
Cons of not following the adjustment chart
- Suppose you put excessive weight on the bike and do not have sufficient psi in the suspension system to handle the load.
- In that case, you may face the risk of your motorcycle bottoming out.
- This is not healthy for the bike, and it is not a safe and comfortable way to ride your bike (it affects handling).
- If the applied pressure exceeds the recommended limit (35 or 50 psi). This may damage the suspension system.
Adjustable Air Ride from XFMT
This is an excellent design that you can install on your Harley Davidson. It is a perfect fit for Harley touring models between 1994 and 2024.
The shocks support a wide range of applications and come with everything you need or expect from a top air shocks design.
The box is packed with the necessary components or hardware, including an easy-to-read installation manual.
This makes the installation effortless, even for Harley riders who haven’t performed shocks replacement or adjustment before.
You can adjust the height of these air shocks according to your preference, ensuring you achieve the desired fit for your motorcycle.
If you release all the air in the shocks, you can easily lower your bike to about 3-inch.
Also, when fully collapsed, these shocks reach about 10-inch and 15-inch when fully extended.
Highlighted features
- Fits For all Harley touring models 1994-2020
- Lowers bikes up to 3-inch
- Adjustable height
- Comes with a center stand
- Complete kit (installation manual and components)
- Top-quality metal, aluminum, and stainless steel
FAQ’s How To Adjust Air Shocks On Harley Davidson
What makes the Harley Davidson air pump different from other air shocks pumps?
Harley Davidson compact air pump offers a lot of benefits. Although it is more expensive than every other hand pump on the market, it is worth the price.
Thanks to its impressive build quality. The Harley pump is very small (around 8-inch in length). You can simply store it in your saddlebag and move around with it.
Also, it doesn’t display a lot of air per pump, making it less likely to damage the rear suspension shocks.
The built-in gauge displays the amount of air pressure in the suspension shocks and goes from 0 psi to 60 psi. Hence, you won’t have to invest in a separate gauge.
How long do air shocks last?
Several factors determine the lifespan of the air shocks installed on your Harley.
The notable factors are the quality of the shocks installed, your riding style, and maintenance.
Usually, your shocks should last about 50,000 miles before they eventually become due for replacement or upgrade.
What happens if I use an air compressor to adjust the shocks?
When you attempt to adjust your air shocks with the air compressor used in putting air in tires, you will force excessive air into the suspension shocks.
As a result, that air will exceed the maximum psi that the system can handle.
This may blow a seal in your rear suspension or damage the overall suspension system.
How do I decide the ideal psi in my air shocks?
The ideal air pressure in your air suspension system depends on the load or weight of the rider.
Suppose you are carrying a passenger or luggage. In that case, the air pressure is decided based on your weight and the weight of the additional load.
What happens if the air suspension fails?
When the air shocks suspension fails, the air springs receive lower pressure.
In the end, the suspension will drop, and your motorcycle will sit very low to the ground.
How much does Harley Davidson’s air shocks cost?
The price of air shocks depends on some factors. These factors include the type, design, or brand of the air shocks you want to invest in, the features, and where you are buying your shocks.
Buying your air shocks from an auto shop may be more expensive than buying on Amazon.
On average, the cost of air shocks is between $150 and $1000. Usually, the complex or top-quality shocks are costlier than the regular ones.
Also, they come with the installation hardware you need to achieve an excellent outcome.
What happens if I drive a bike with a failed suspension?
If your bike’s suspension collapses or becomes damaged, it is not safe to ride on it.
A broken spring causes noise, and it also affects control and stability. If you attempt to drive a motorcycle with a broken suspension.
The ride will be very rough, and you will find it difficult to control the bike in case of an emergency.
Verdict
Now that you know how to adjust air shocks on Harley Davidson. You also need to consider or get familiar with some vital details.
There are two air shocks on your Harley motorcycle. So, whenever you make an adjustment to one, it serves or affects both. Hence, these shocks are not adjusted separately.
While the air shocks adjustment sounds or looks easy, you need to be patient and careful throughout the process to avoid causing any damage to the suspension system.